Photography quite simply comes from the combination of “photo” meaning light and “graph” meaning writing. Light writing all comes down to having knowledge of two things, your shutter and your aperture. A shutter is a door that opens and closes in your camera, it’s that sound you hear in old manual cameras as well as the “shutter sound” you can set on your point and shoot. It’s the movement of the shutter that creates that iconic “click” well that and the mirror moving out of the way.
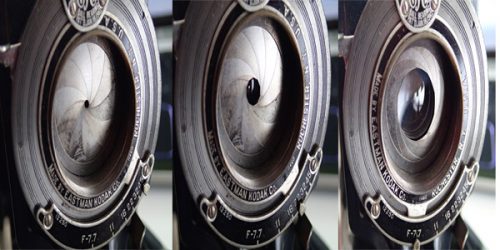
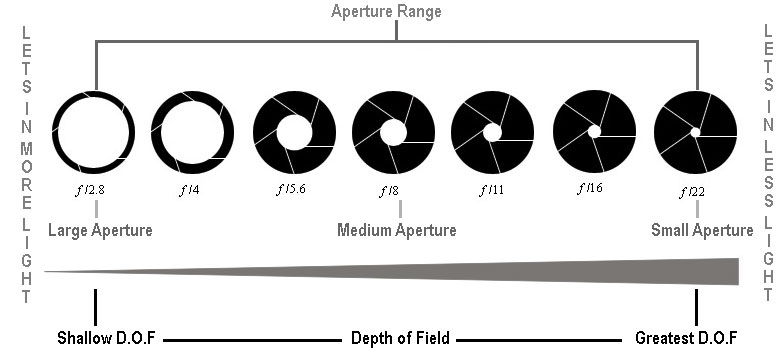
The aperture is basically a hole that you can manipulate in size which is commonly called the F stop. The larger the F stop number, the smaller the opening. The F-stops are measured by the hole’s size. This is where it gets tricky; the aperture or F-stop gets smaller the larger you make the number. F22 is a tiny opening while F4 is much larger. In the picture above, you can see how the smallest hole is 45 and the largest hole is a 7.
So what happens if you open up (go to a smaller number) or close down (go to a larger number) your aperture? What does that really do? The smaller the number, the more light you let in but you also limit the focus that the camera has on an object. An F stop/aperture like 22 will create what is called greater depth of field.
Assignment #1 Depth of Field Experiment
Depth of field is the manipulation of aperture to control what is and isn’t in focus. Here’s an assignment to try with your kids but you will have to have a camera that allows you to manipulate the aperture. In most cases, the “A” setting on cameras is the Aperture priority setting. Choose three objects: a small, medium, and large object that you can place in a row. The larger (taller) object should be in the back with the medium object in the middle and the smaller (shorter) object in the front.
Have your kids pick the objects. It’s a good way for you to talk about size relativity. Toys will probably be the best subject matter for them.
Shoot a photo of this setup one time for each aperture your camera allows you to change keeping the setup and angle the same every time. For example, my camera allows me to shoot at F27, 22, 19, 16, 13, 11, 9.5, 8, 6.7, 5.6, 4.8, and 4. Write your camera’s numbers down on a piece of paper and when you take a photo write next to that number what your camera chooses for a shutter speed. Ie – 250, 125, 30 etc.
Focus on the object closest to you before taking the shot. Keep in mind that when choosing aperture priority, that your camera will have to compensate by adjusting the shutter. When you have a small opening, it will have to leave the shutter open for a longer time which means any movement including touching the camera to press the shutter release will cause blur.
If this happens, set your camera on timer mode (if applicable) and place the camera on a sturdy table to take the shot. However you shoot it, it must be from the same position every time so you can see how the aperture selection affects the shot.
After taking the shots, print them out or look at them on the computer together. Ask them what do they see that is different and what is the same? If you print out two different shots and give them a pen, they can circle what parts are the same.
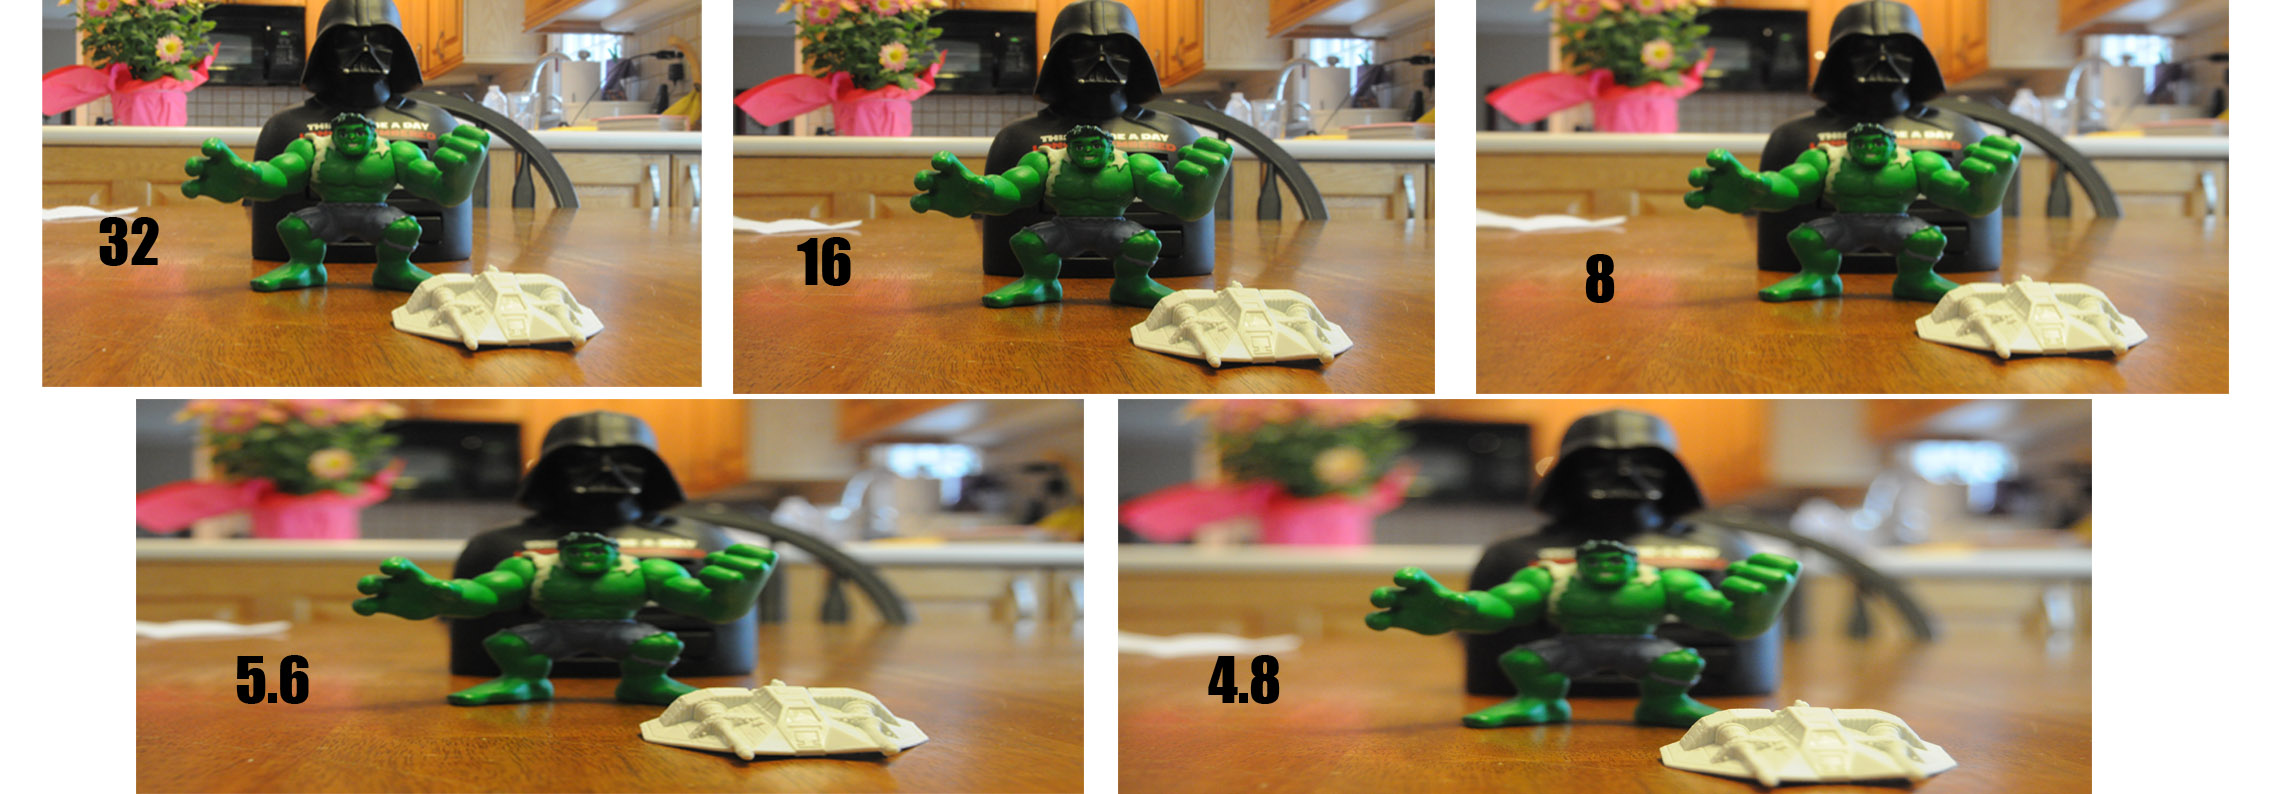
What you should see is a progression of shots where the objects will change in focus depending on the settings. You’ll see in my example at F32 that all of the objects are in focus but that was shot at a shutter speed of 1.5 seconds which would be blurry if it weren’t on a table. At F8 you can see The Hulk and Vader start to go out of focus with the Snow Speeder still in focus. By 4.8 Vader and Hulk are both fuzzy and only the Speeder is in focus because it is the closest object to the camera. You may also notice that the background becomes less sharp just by changing the aperture!
Next week’s Shutterbug assignment : The Shutter Island